|
|
||||||||||||||||||||||||||||||||||||||||||||||||||||||||||||||||||||||||||||||||||||||||||||||||||||
Language utilisationThe UPDD auxiliary programs have been written to support multiple languages and UPDD ships with a number of language files. When invoked the utility programs will automatically detect the systems locale (language setting) and switch to the appropriate language if the associated language file exist otherwise English (US) text is displayed as default.
As of 25th Jan 2014 the UPDD version 4 language files have been frozen and a new set of language files created for UPDD 5.1.x therefore we only have the ability to add or amend text for subsequent translation in version 5.1.x.
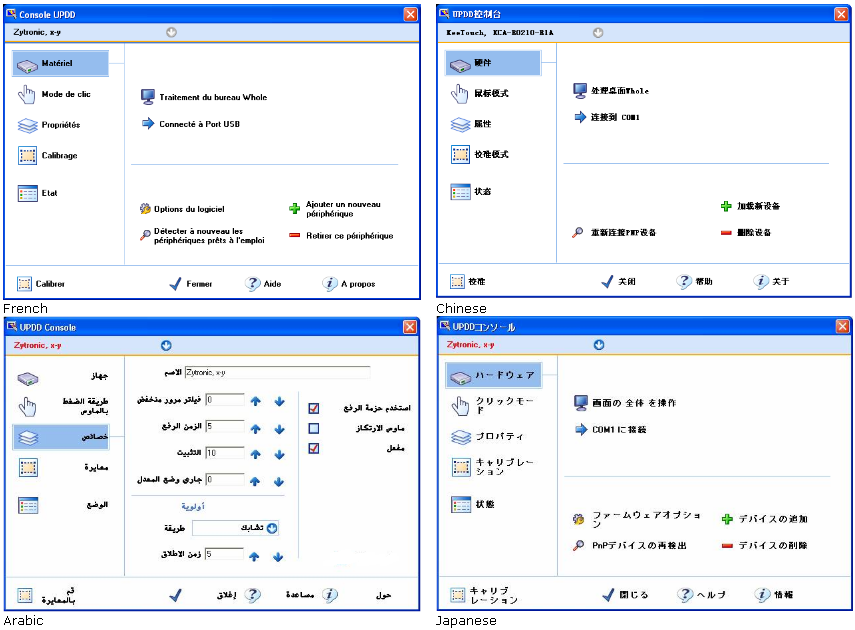
Here as some examples of the UPDD Console in various languages:
The language font should be rendered correctly on a system where the native language support matches that in UPDD. Given that UPDD auto selects the translations based on the OS language this will always be the case for normal usage.
A UPDD setting and command line parameter also exists to override the language selection and specify the actual language suite to use as described below. Language selectionIn normal use the language selected by the UPDD utilities is defined by the system’s locale (the native language of the system). However, this can be overridden if required as described below. It is important to understand that when overriding the language selection on a non native system it cannot be guaranteed that the language font will render correctly. An example of a badly rendered font is shown below. UPDD wide settingIf you want to view all UPDD utility programs in a different language to the locale of the system then you need to change the UPDD ‘Language’ setting to define the language file to be used. E.g. setting the value to DE whilst using an English system will force UPDD to use the German files.
For UPDD version 4.1.x and above this is held in the UPDD INI file under the [UPDD\parameters] section. You can use the 4.1.10 command line interface to change this setting. This Windows example “tbutils nodevice sz language JP” defaults UPDD language selection to Japanese. Individual utility selectionIn all UPDD version 4 and above, a command line parameter (-lang xx) can be passed to all UPDD utility programs as an alternative way to specify the language file to be used. This is particularly useful for utilities that do not have access to the above UPDD setting, such as the UPDD install program.
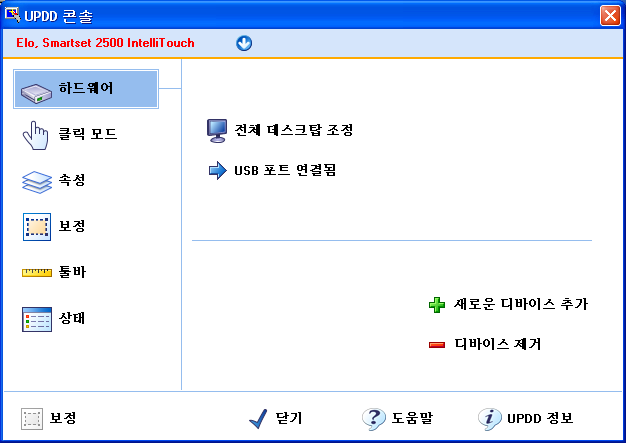
In the following example, dcu –lang ko will show the UPDD Console with the Korean language:
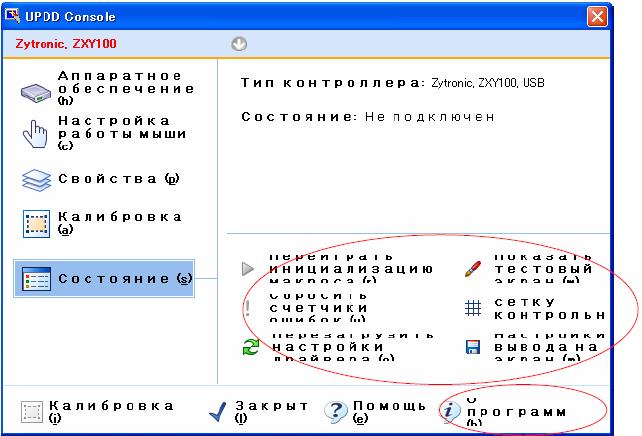
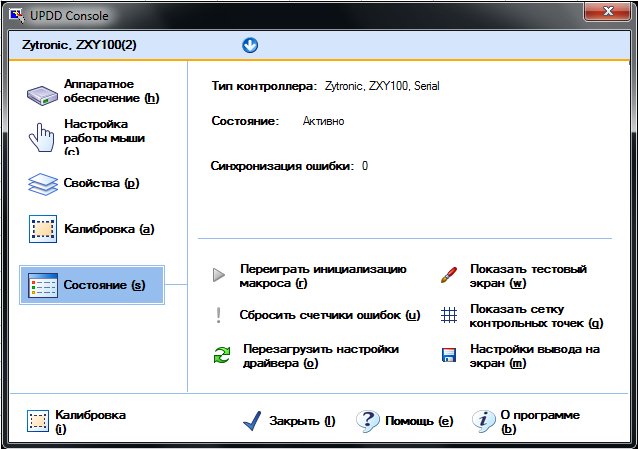
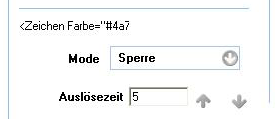
As discussed earlier, when using / viewing languages on a non native system the font selected for display of the languages may cause wrapping issues as shown in these two examples of the same UPDD dialog – one where the font causes issues and another where it is OK:
Translation ProcedureStarting with UPDD Version 4 it is our intention with to create, over time, a complete set of language files. The remainder of this document describes the translation procedure, language files and the methods used to create and maintain the files such that anyone with suitable knowledge can assist us in the translation process. Translation filesThe UPDD auxiliary programs have been written in a cross platform development tool called QT. QT translations are held in files with .qm extensions. Each translation files is associated with a specific program in the UPDD suite, as shown below:
The xx element of the file name relates to the system locale code use to identify the system language.
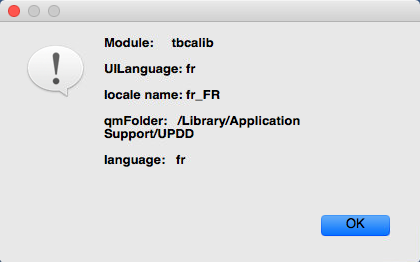
Starting with UPDD build 5.1.1248, updd now utilises a common component to detect languages and select appropriate translations.
aidaemon dcu (also used in Windows setup) helpviewer tbcalib updddraw
The module selects the 2 character language code as follows
If a code is passed as an argument to the program then that code is used and processing continues at the qm selection stage.
Otherwise if the language override setting in tbupdd.ini is set then this is used and processing continues at the qm selection stage.
Otherwise the preferred ui language is obtained using a Qt API QLocale::uiLanguages. Then the following logic is applied.
If the system locale (as given by QLocale::name() ) is zh_TW or zh_HK then a language code of ct is used.
If the system locale (as given by QLocale::name() ) is en_GB then a language code of en is used, otherwise if the ui language is en translation processing is skipped and the internal US English values are used.
See http://www.science.co.il/Language/Locale-Codes.asp for a comprehensive list of locale codes. Locale identifiersAs and when we support a language the appropriate QT UPDD translation files will be placed in the UPDD translation FTP read only folder at ftp://translate:translate@ftp3.touch-base.com/lupdate. Currently the translation files held for UPDD are:
* - Chinese systems report ZH for 2 character locale. UPDD analyses the extended 5 character code and for Taiwan and Hong Kong utilises UPDD Traditional language files CT (e.g DCU_CT).
Language filesTranslation files are processed and integrated into the UPDD production system and distributed as UPDD language files as part of the standard install. These language files will also be available from the UPDD language FTP folder at ftp://translate:translate@ftp3.touch-base.com/qm. LocationBy default the .qm language files (named <module>_<lang>.qm) are placed in the UPDD application folder. Should the files need to be located elsewhere copy the required files to the new folder location and specify the path of the folder in the QMFolder setting in the [updd\parameters] section of tbupdd.ini settings file. You can manually edit the file or use the tbutils command line interface, such as: Tbutils nodevice setting sz “QMFolder=c:\program files\updd\testqm".
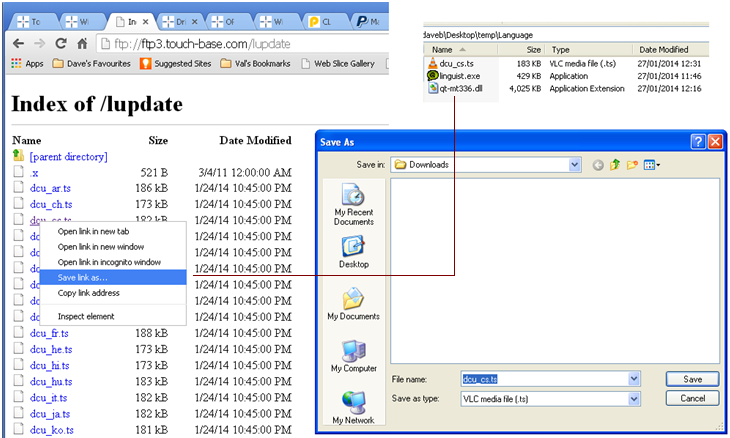
If a file with a name matching that of the current module + selected language code is found then it is used. Translation process and submissionShould a language file not be available, or need amending, and you or your organisation is able to assist in the translation process please note the following procedures to submit translated text.
1) Download the
QT translation tool (linguist.exe
– click to initiate download) and its dll (qt-mt336.dll
- click to initiate download) to a folder on a Windows system. They can also
be downloaded from the FTP site ftp://translate:translate@ftp3.touch-base.com/lupdate. 2) Copy the *.qm
files (from the same FTP location as 1 above) appropriate to your language to
the same folder.
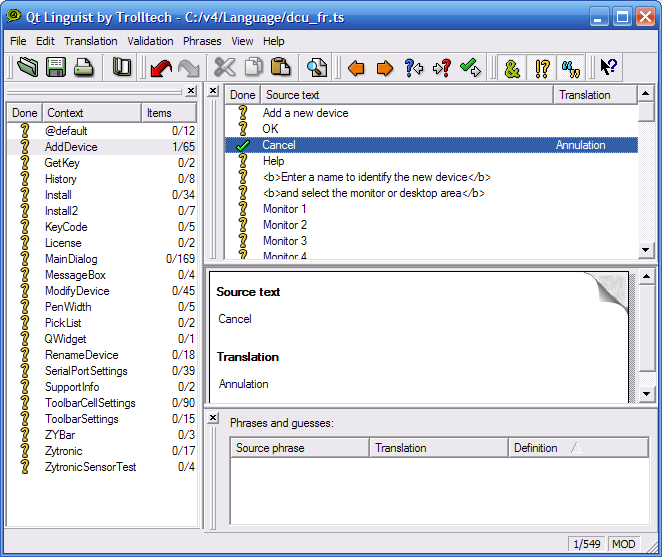
3) Open each of the translation files in turn using the translation tool (linguist.exe program) and translate the listed text, as shown in the example dialog below:
The left hand column shows the
number of translations within the module and the number completed. As each
translation is made click on the
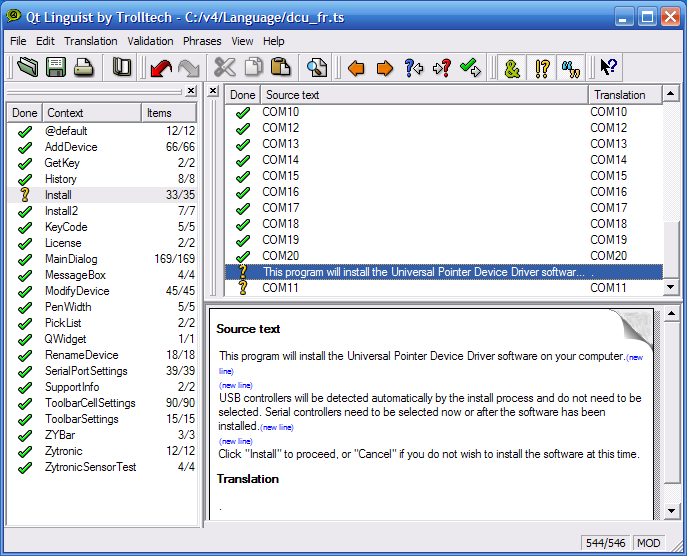
In the following example there are two outstanding translations in the Install module. All other modules are complete:
Note that in the above translation the system is showing where a new line (new line) is embedded in the text. Where these hidden characters are shown please ensure the translated text contains that same formatting e.g (new line) should have a new line in the text, (sp) should have a space etc.
In the example below the translated text has a space at the beginning and the end:
i.e. German example
VERY VERY VERY IMPORTANT NOTE2: Do not translate com port names as these names are used to reserve the serial port for use by the driver. i.e. COM1 must say COM1 etc.
4) In the
calibration program, during calibration, we display the name of the
controller being calibrated and also show the desktop segment. As an
example, in English this would be shown as “Touch Controller X on Monitor 2”
This sentence comes from the text strings (found in TBcalib_xx.ts, section
QWidget): 5) Some text does
not need to be translated as in a very few cases there is customer related
entries which are used in special OEM builds of our software: Examples of
this text is; Egan PowerX, Easiteach Teamboard, Zytronics. If there is text
that you are unsure of email us and we will advise further. 6) Some text associated with controls ends with 3 dots … This has a specific meaning in the Windows user interface guidelines and as such should be retained in the translations.
7) If an
exclamation mark (
8) Once the new
or updated translation files are ready (and tested)
and all translations entries are ticked (
9) Once processed you may download the language (*.qm) files from ftp://translate:translate@ftp3.touch-base.com/qm and copy to your UPDD application folder. These files will be used automatically when a language file that matches the OS locale is found. The most up-to-date language files will be applied to production released software.
The translation process is iterative. After each translation cycle the display and operation of the software will be reviewed and further translations may be required as a result. TestingThe updated translation file will be processed by Touch-Base and made available for testing. Having downloaded the updated language file you can run up the appropriate UPDD utility and view the new translations. Prior to submitting the updated translation files you can create a language file using the program lrelease.exe passing the names of the .ts and .qm files;
e.g ’ lrelease dcu-cs.ts dcu-cs.qm’. ConsiderationsThe UPDD dialogs are initially laid out with the English text and therefore the white space available for translated text needs to take into consideration the space initially allocated. Generally speaking text will wrap if it is longer than the allocated space and will not always be readable if the text exceeds the available height of the allocated area should it wrap.
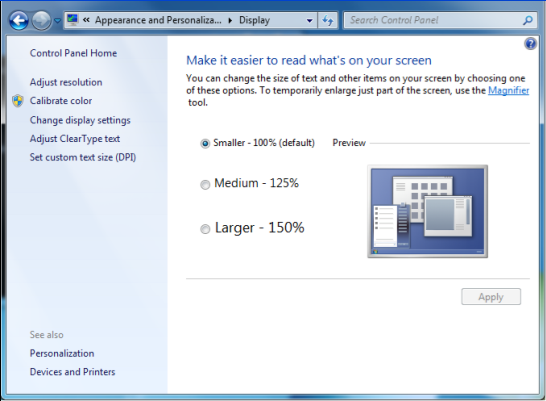
When considering the translations to use you also need to consider if the system can be configured to utilize large font sizes and try and cater for the range of dialog fonts. For example, in Windows 7, the end user can specify text size to use in the Display Properties and it is important to test the translations in all the available options.
Where display issues are seen it may require the translation to be adjusted or we may be able to increase the area available for the text display. Help FilesUPDD drivers are supplied with on-line help files. Custom or translated help files can be created for distribution with our software if required. The Help file document describes the help system and the files used.
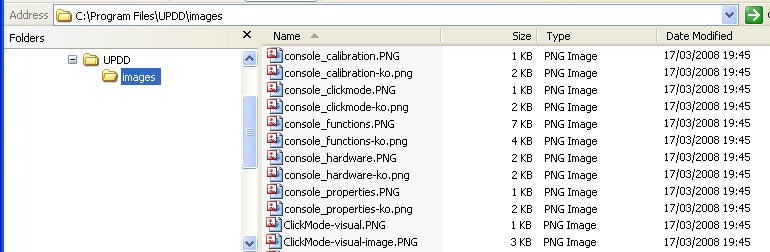
These files should be reproduced in the required language and send to us for inclusion in the software. We use a cross platform help viewer, called helpviewer, to view the files and this is delivered as part of the UPDD software. To test the appearance of the completed help file use ‘helpviewer [filename]’. The help viewer may not handle all aspects of the HTML language so do not use advance features in the help files – keep it simple! Help file imagesThe help file images, in the supplied English help files, are held in a sub-folder called images. Listing the images sub folder in UPDD will show all the images used and their file names. The path to these images as held in the help file will be:
src="images/[imagefile].png"></span></b></p> e.g. src="images/calibration-style.png"></span></b></p>
If you create new language help files you should also create the same image files for the designated language. The directory listing example below shows the list of both English and Korean images. The Korean images have the ‘–ko’ file extension. To create a new set of images copy the English image file to the required language image file. E.g. console_calibration.png becomes console_calibration-JP.png for create a Japanese file. You then replace the image with the Japanese version, cut from the UPDD dialogs.
Replacing images in the help fileWhen replacing existing images the easiest and quickest way is to load the file in a text editor, say Notepad, use Find to locate the image name in the file, say calibration-style.png, and modify the name to add the language notation, e.g. calibration-style-jp.png Create and add new imagesShould you need to create and add new images into the help file it is important you abide by the following rules: accent
Images should be held in an ‘image’ sub folder under the help file folder.
This is a requirement of our source control, production system and UPDD file structure:
The images must be referenced as external files and not embedded in the file.
For example, if using Microsoft Word to create the file use the ‘Link to File’ option when inserting an image, as shown below:
The image file paths are held as relative paths and not absolute paths
Once the file is created and all images have been embedded it is important that the image path in the HTML file is a relative path to the Images folder and not an absolute path. One way to check this is to load the file in a text editor, locate the image and see the path used.
In this example, we have opened up the .htm file in NotePad and located the image, which is being held as an absolute path:
This is edited to make it a relative path and the file is saved. Therefore in the above example:
src="../../../../../TBA/config/files/LATEST/help/images/calibration-style.png"></span></b></p> becomes src="images/calibration-style.png"></span></b></p>
To test that the images are ok, place the help files and images on a ‘new’ system with the helpview program and run up each help file in turn: e.g. C:\helptest (.htm files) C:\helptest\images (images)
If the image is not seen in the file then the path is not pointing to the image folder and needs updating. Once all files load OK and ALL images are displayed correctly from the image path send all the files to us for inclusion. Licence FilesUPDD license details are displayed from the UPDD Console, About Box, View License option. This license is displayed in English unless the appropriate language licence file exists. To create a licence file in a different language copy the licence file licence-en.txt in the UPDD application to the appropriate language file (e.g. licence-ko.txt for Korean) or download the text from here, add the translations using a NotePad type tool and submit the update file to Touch-Base.
In some cases (such as Japanese) the control used to display the license text has failed to reliably find the string length of the file and not all the text has been displayed. Should this occur on any translated licenses you can use the marker <EOF> which the control can identify as the end of the text and display up to that point. Program Manager menu entriesThe program Manager menu entries are defined in a text file called menuv4xx.txt where the xx element of the file name relates to the system locale code use to identify the system language.
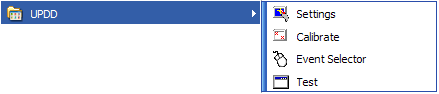
The Program Manager menu entries appear as follows on an English system:
The text is taken from the menuv4xx.txt file. The format of the English file is as follows:
tbalt.exe;Event Selector;;0;1 updddraw.exe;Test;/test;0;1 dcu.exe;Settings;;0;1 tbcalib.exe;Calibrate;/all;0;1
To create a locale menu files perform the following steps:
1) Create a file using notepad called menuv4xx.txt where xx is the system locale, e.g. ja = Japanese 2) Copy the above 4 lines and paste them into the .txt file 3) Translate the 2nd element of each line, as highlighted in bold above. 4) Save the file
as ANSI 5) Email the file
to language co-coordinator Gary Allitt at gary@touch-base.com Example file after translation, in the case to German:
tbalt.exe;Maustastenauswahl;;0;1 updddraw.exe;Test;/test;0;1 dcu.exe;Einstellungen;;0;1 tbcalib.exe;Kalibration;/all;0;1 Selecting languagesSystemWindowsSince Windows 2000 the operating system can support a number of languages and keyboard layouts as listed at http://support.microsoft.com/?kbid=292246. The same article describes how to install and utilise the language utilities via the Control Panel, Regional and Language option.
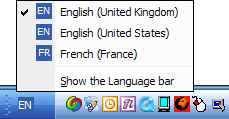
If the Language bar is enabled in the task bar it can be used to switch languages, as shown below.
This allows for various languages to be tested with the same keyboard layout and may be of use when testing.
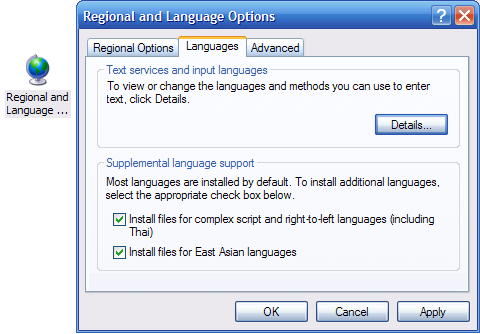
When testing/viewing languages on a fixed locale system it may be necessary to have installed supplemental language support as shown:
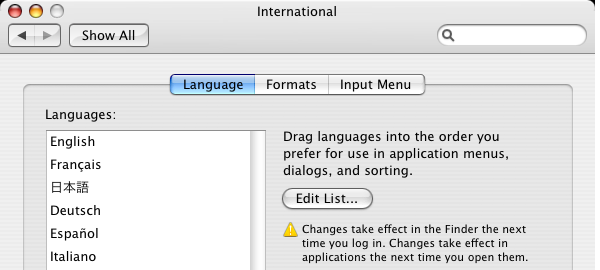
Mac OS XThe System Preferences, International dialog can be used to specify the system language to use in application menus and dialogs, as shown below:
LinuxTo follow. ContactFor further information or technical assistance please email the technical support team at technical@touch-base.com and the language co-coordinator Gary Allitt at gary@touch-base.com.
|
||||||||||||||||||||||||||||||||||||||||||||||||||||||||||||||||||||||||||||||||||||||||||||||||||||