|
Configuring UPDD extended touch
for multi monitor support in Windows In these operating systems UPDD implements a feature
known as “extended
touch”. In this mode UPDD uses a virtual HID device interface to appear
to Windows as a fully HID compliant device, regardless of the type of device
actually attached. In 4.1.10 only one virtual HID device is installed,
irrespective of the number of monitors connected to the system, so this only
caters for one touch device working in extended touch mode. Starting with
UPDD version 5.0.2 one such virtual HID interface is installed for each
monitor detected. By default the virtual
HID device(s) are initially associated with the primary monitor so that any
touches will result in cursor movement on the primary monitor. With multi monitor environments we had hoped to find a way to programmically assign each Virtual HID entry to the
monitors defined on the system but unfortunately this was not possible, hence
the need to perform these manual steps. These notes describe how to associate a touch screen
device with UPDD extended touch enabled (uses the virtual HID interface) for
monitors other than the primary monitor such that touches on that monitor
move the cursor on the correct extended desktop. Therefore these notes only have to be
followed when using a touch monitor on a Windows extended desktop (non
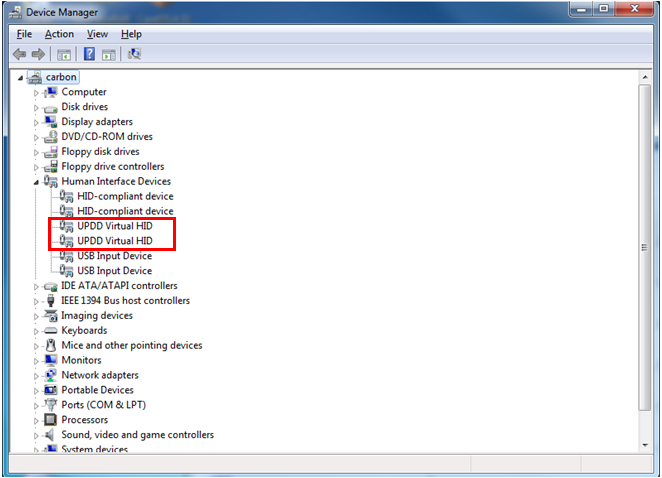
primary monitor) and with the UPDD Extended touch setting enabled. Setup Procedure Install UPDD as normal and connect all monitors and
touch devices. UPDD will create a Virtual HID entry per monitor found.
Here is a similar Windows 7 example
It may be necessary to wait a while for the entries
to appear in the Device Manager. Using the UPDD Console, each
connected touch screen needs to be associated with the unique desktop monitor
as follows. In this example there are two touch
screens:
Select the Windows monitor as
required.
For the purpose of the Virtual HID monitor
association it does not matter which monitor is chosen, so long as each
device has a different monitor number. If you intend to switch between UPDD
Extended Touch and Mouse interface then the correct monitor number should be
selected at this stage. If it is not known then use the Configure
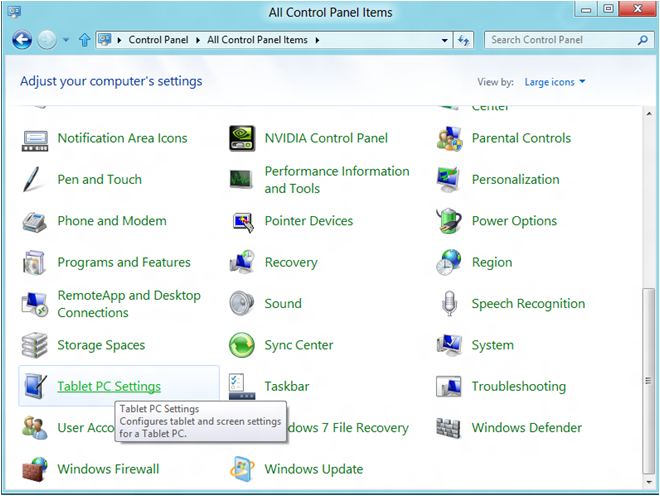
All… option to make the monitor assignment. Open the control panel and select the Tablet PC
settings option. On Windows 8 access the control panel by pressing
the Windows key, type “control” as shown below and click “Control Panel”.
The control panel options from Windows 8 are shown
below, Windows 7 is very similar.
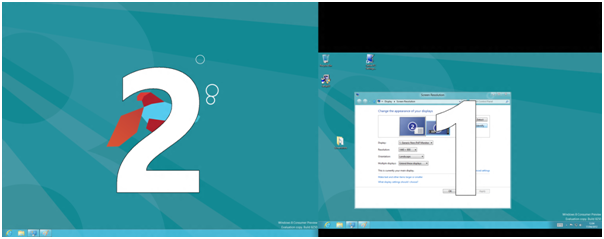
Select the Display setting, then “Change display
settings”, then Identify. The monitors will be identified thus:
Note the monitor layout. Now select the Tablet PC Settings
On the Tablet PC settings screen above, run the
following sequence for each touch screen display in turn: 1)
Click setup 2)
Press enter until this screen is
displayed on the monitor number selected in the Display above. 3)
Now touch the monitor on which it
is displayed two or three times until the text changes. 4)
Press enter to skip through any
remaining screens until the window closes.
5)
Click OK 6)
Open the TABLET PC settings again
to set up any further display/touch associations. |