|
Revision 1.13, 25th Sept 2009 Mac OS X Installation |
||||||||||||||||||||||||||||||||||||||||||||||
|
Welcome
to UPDD Mac OS X platform specific installation instructions and related
notes. These
notes should be followed to install the UPDD pointer device driver on Mac OS
X platforms utilising 10.2 and above. Driver build history
|
||||||||||||||||||||||||||||||||||||||||||||||
Deliverables
For Mac OS X the
program is distributed as a single compressed file macx.sit (pre Sept 09
version) or macx.tgz (since Sept 2009). We are aware .sit
files are an old Mac OS X compressed format which requires StuffIt for
decompression and we are sorry for any inconvenience this may cause. The software will
be delivered in one of three ways:
The UPDD software
comprises: Setup.app The installation program tbbundle.h The UPDD header files defining the API
calls to the driver if writing applications to interface with the driver |
||||||||||||||||||||||||||||||||||||||||||||||
System Requirements
We are not currently able to create a universal driver that supports both Power PC and Intel processors so we are shipping separate drivers. Please make sure you have the appropriate driver for the processor. |
||||||||||||||||||||||||||||||||||||||||||||||
CD Distribution
The contents of the .sit file are placed on
the CD under directory structure /macx.pkg/ ensuring case of the files
names is preserved. Insert the CD and it is automounted to the
desktop. Double click the CD icon. This is as close as you get to auto-run
with the M |
||||||||||||||||||||||||||||||||||||||||||||||
Classic Mode issues
In some
instances, with classic mode applications the click emulation is not as good
as expected, especially with quick taps on the touch screen. We changed the way our driver was
internally handling OS mouse interfacing when in classic mode but
unfortunately we could not fine a solution that worked well for both modes so
we have introduced a new setting called ‘Support Classic Mode’.
Try this setting in the UPDD Console –
Properties page if classic mode applications do not respond as expected. |
||||||||||||||||||||||||||||||||||||||||||||||
Installation NotesGeneral
1. Mac purist will note that the
software does not follow some Mac development standards. The common issues
raised are:
2. One customer reported that a
stuffit error was reported (using Stuffit 10.x) when trying to unpack the Macx.sit
file. The problem was overcome when they unchecked the preference
“Continue to expand if possible”. 3.
M 4.
A customer reported that an HID compatible
touch USB controller was still controlled by the HID driver after installing
the UPDD driver when using Tiger version 10.4.0. Upgrading to 10.4.2 overcame this issue so
we have not investigated further as we believe most users will be on 10.4.1
or above or be able to upgrade. Very Important Notes
1)
We
are not currently able to create a universal driver that supports both Power
PC and Intel processors so we are shipping separate drivers. Please make sure you have the appropriate
install for the processor. 2)
Reinstalling considerations when
installing version 4.1.1 and above: 3)
Make sure the file created is
called setup. If a previous setup file
existed on the desktop the file created by Stuffit will be called setup.1 and
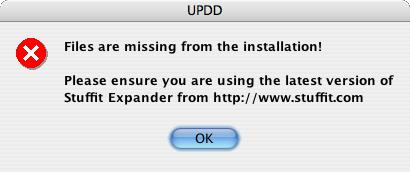
this cannot be used to install the software. 4)
If, during install, the list of
controllers is empty DO NOT CONTINUE.
Stuffit has failed to unstuff all the required files and the setup
program has failed to locate its configuration file. Later versions of the
software will issue the following message 5)
Installs have not always been
successful on systems with inconsistent permissions. If unresolved install
issues occur please load up the Disk Utility from the utilities folder,
select the hard drive and select Repair Disk Permissions and try the install
again. 6)
If you select a serial controller
you will be shown a list of serial ports found on your system, as in this
example a virtual serial port created by a serial to USB adaptor and its
driver:
If you are installing on a system that does
not currently have a serial port installed or wish to define the port at a
later time then select the None option.
If your serial port is not listed, select None and then refer to the
serial port section below. |
||||||||||||||||||||||||||||||||||||||||||||||
Installation ProceduresCopy the compressed file
to your desktop. Note: If the file is downloaded via a browser then some browsers,
such as Safari, will automatically extract the .tar file from the .tgz
compressed file and create setup.tar. This file should be copied to your
desktop. Now double click the file
(macx.sit, macx.tgz or setup.tar). The
associated extraction program (.sit = Stuffit, others = Archive utility) will
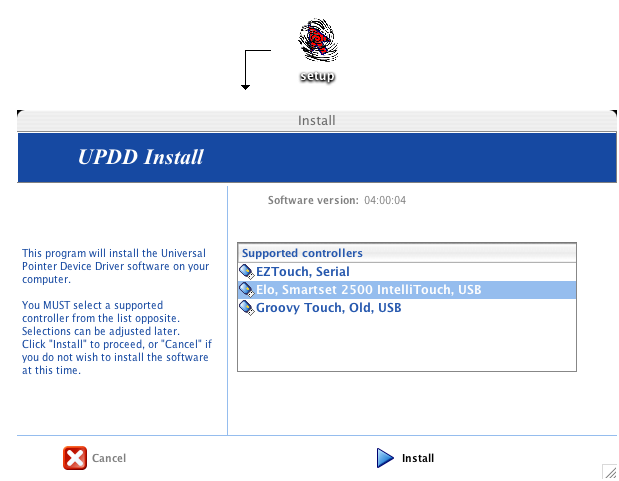
run to create the Setup program. Double click the setup
program icon, enter your Mac users password and the controller selection
dialog will be shown (with version 4.1.x there may be a delay
before the install dialog appears due to the large size of some of the
libraries embedded in the setup that need to be extracted):
Select the controller from the
list of controllers shown in your version and wait for installation to
complete. Following installation the software will be
placed in /TBUPDDMX folder, with UPDD Console and calibration utilities
aliases placed in the Utilities folder and, for convenience, also on the
desktop. With 4.1.x and above the UPDD Console will automatically list all
USB touch devices supported by the driver and plugged into the system. |
||||||||||||||||||||||||||||||||||||||||||||||
Calibration
After installation,
the Calibrate icon appears on the desktop and in the Utilities folder.
Calibration is a procedure used to align the pointer device with the graphically display area or desktop segment. When using the pointer device the mouse cursor should normally position itself under the stylus when it is in contact with the pointer device. If this is not the case then calibration will be required and this is described in full in the Calibration document. |
||||||||||||||||||||||||||||||||||||||||||||||
Driver settings – the UPDD Console
After
installation, the UPDD settings icon appears on the desktop, in the Utilities
folder and in the System Preferences, Other section.
The
driver and device settings can be adjusted with the UPDD Console program and
is described in full in the UPDD Console
documentation. |
||||||||||||||||||||||||||||||||||||||||||||||
Serial port
issues
The UPDD Console,
Hardware tab allows the serial port name to be changed after installation, if
required. E.g.
Use the dropdown to
select the name of the serial port. If your serial port is
not listed, read on. Serial port identification and testing
We use a file called serial.dat to
define the structure of valid native and virtual com ports available on a
Mac. If your serial port is not listed then the file structure is not defined
in the serial.dat file. Serial port names can be found in the /dev folder (as seen from a Terminal window’s LS command).
In the above example a virtual serial port is listed as cu.KeySerial1. This is a Keyspan serial to usb adaptor. If you have a serial port entry that is not being shown in the serial port dropdown you need to modify serial.dat file, adding an entry that reflects the port structure seen. Typical entries in serial.dat that define the serial ports we have encountered this far are: ^cu\.USA* ^cu\.KeySerial* - This entry relates to the serial port listed above ^cu\.usbserial* ^tty\.usb* The file is write protected in a write protected folder. In this instance it is normally easier to take a copy to another folder, use “CHMOD 777 serial.dat” command to modify permissions, update the file with textedit and then “sudo cp serial.dat /tbupddmx” to copy back the updated file. Please let us know what serial port structure you have so we can update the master file for future use. A Universal Binary (a
driver that runs on both Intel and Power PC Macs) Keyspan USB serial adaptor
Mac OS X driver is available on the Keyspan web site, downloads page. Keyspan drivers
also install a utility program which will list the name of the com port. In
the following example the utility Keyspan Serial Assistant is invoked to list
the port name:
The OS adds a number
to this name to give each adaptor a unique identifier, 1 for the first port,
2 for the second etc If you need to use a Serial
to USB adaptor, only those supplied with a Mac OS X driver will work. At the time of writing (Sept 2005) Belkin
and PalmConnect do not have such drivers.
Keyspan and adaptors using the Prolific chipset (branded by iogear and dynex
amongst others) do have such drivers.
One customer noted that the Prolific drivers are available in .dmg and
.hex format and for him only the .hex file worked. He also reported that the adaptor must be
connected to the Mac during install.
The com port name given to many of these adaptors in the Mac OS X
system is /dev/cu.usbserial. Serial port testingShould the serial port connection not be working there are a number of procedures to follow to help identify the problem as described in the knowledge base article here. Note: If a virtual serial port (via
USB) is unplugged and replugged the touch may stop working. If this is the
case use the UPDD Console. Status, Reload driver to re-establish connection
(or reboot the system). |
||||||||||||||||||||||||||||||||||||||||||||||
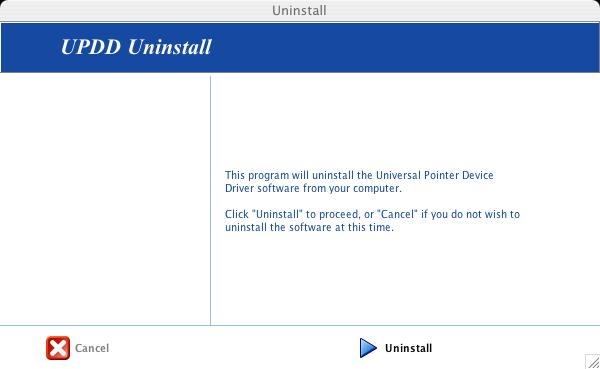
UninstallAutomatic (4.1.1 post 17th Sept 2008)To uninstall the software open a “Finder” window and on the left hand side click the icon for your hard disk. Double click the folder “tbupddmx” in the main window and then double click the “uninstall” program.
Click “uninstall” to uninstall the program or “cancel” to cancel the uninstall. You will need to enter your login details to authenticate the uninstall and then the process will start. Manual Uninstall (4.0.x and 4.1.1 before 17th Sept 2008) To uninstall the driver requires the Root User account to be activated as it is necessary to login to this account to uninstall the driver automatically or login as a Super User (with root privileges) in a Terminal session to manually uninstall the driver. If the root user account is not active on
your system it can be activated as shown below. If it is active you will need to know the
password to allow you to log in as the root user/super user. Activating Root UserThese instructions apply to Mac OS X 10.2.8 and above
– for earlier versions replace the NetInfo Manager navigation path
‘Security >’ with ‘Domain > Security >’ Start the NetInfo Manager application.
From a Desktop Finder window, locate and launch the NetInfo Manager
application, found at /Applications/Utilities/NetInfo Manager. Choose Security > Authenticate and
enter the password you use for your local account.
Choose Security > Enable Root
User.
Now choose Security > Change Root
Password to set a password for root.
If the Root user has been previously
activated you will need to enter the old password before you can select a new
password. If it was not previously
activated you will be asked to select a new password. Now that you have activated the Root user you will either be able to
login as the Root user at the login screen to perform Automatic uninstall or run
as a Super user (typing ‘su’ in a Terminal window) with root
privileges to perform a manual uninstall of the driver. Note: Running as a Super User in a terminal
window is not the same as logging in as a Root user. Logging in as a Root user gives system wide
root privileges whereas logging in as a Super user in a terminal session only
gives root privileges to the terminal session and the command typed within
the terminal. After you’ve completed all tasks requiring root access, you can
relinquish root privileges by choosing Security > Disable Root User
Manually
To uninstall the application simple drag the
UPDD icons (initially installed in the utilities sub-folder within the
Applications folder) to the trash can and delete
any related icons from the users desktop. Uninstall the driver
To uninstall the driver, the “root”
account must be activated on the system, see activation section
above. Perform the following steps to uninstall the driver:- Start a “Terminal” session and
login as root:
Enter the root password that was selected when the Root user was
activated. Type “rm –r /tbupddmx” Type “cd /System/Library/Extensions” Type “rm –r tbupddmxhid.kext” Type “cd /Library/StartupItems” Type “rm –r TBUPDDMX (UPDD version
3 and 4.0.x) Type “rm –r TBUPDDWU (UPDD version
4.1.x and above) Type “rm
/usr/local/lib/libhbutton.dylib” Type “rm
/usr/local/lib/libqt-mt.3.dylib” Type “rm /usr/local/lib/lib Type “exit” Close the terminal ** It is very important
that the commands are entered exactly as above (same capitalisation, no
spaces in the filenames) otherwise other data could be removed from the hard
drive. |
||||||||||||||||||||||||||||||||||||||||||||||
Touch Interface with KeystrokesA touch driver has to interface with the OS to move the system pointer and generate mouse clicks. However, it was discovered that since Mac OS 10.3.6 the interface we used (Interface Method 1 – IM1) did not correctly handle mouse emulation if keyboard keystrokes were being used with mouse clicks e.g. ‘CTRL mouse click’ to select multiple items. We investigated this problem and found another interface method (IM2) which appeared to work well and also handled keystrokes. We added a option to the UPDD Console, Properties page, Support New Events. When this setting is enabled the driver uses the ‘IM2’ interface that overcomes the problems seen with the ‘IM1’ interface. With 10.5.x we discovered that IM2 also had issues with keystrokes and discovered a 3rd interface method (IM3) but unfortunately double clicks do not work with this new interface method so we addressed the issues raised with IM2 which now works with keystrokes but does now not work at system logon due to enhanced security. On the assumption that modifier
keys aren’t required on the login screen, we have currently implemented
a composite approach where on the login screen we use the “IM1”
mode and switch to “IM2” mode in other cases (when “Select
New Events” is enabled). |
||||||||||||||||||||||||||||||||||||||||||||||
Multi-monitor and multi-device supportMulti-monitor and multi pointer devices are supported with this driver and this functionality is covered in full in the multi monitor and device document, Mac section. |
||||||||||||||||||||||||||||||||||||||||||||||
Display rotation considerations
Mac OS/X version 10.4 (Tiger) introduced video rotation where the video hardware supports it. UPDD will work with rotated video and this is explained in detail in the separate rotate documentation. |
||||||||||||||||||||||||||||||||||||||||||||||
Display resolution /
calibration considerations
The calibration mapping
is based on the screen resolution setting at the time of calibration so if
the resolution is changed the calibration will be inaccurate. To cater for this
you will either need to; 1) Manually recalibrate after
changing video resolution. 2) Call TBcalib /screenresupdate to
request the driver readjusts calibration to cater for current video
resolution. For further details, click here. Future releases of the
driver may well introduce a daemon process to automatically monitor video
resolution and adjust automatically but until such times as this is available
manual intervention is required. |
||||||||||||||||||||||||||||||||||||||||||||||
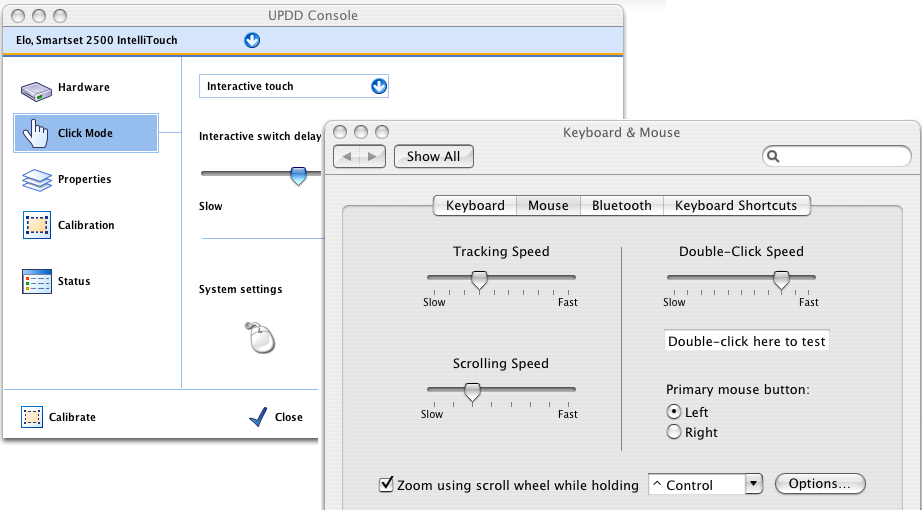
Mouse settingsDouble click capabilities are affected by the system’s Mouse settings. To achieve a double click using the pointer device these settings need to cater for the type of device in use. A touch screen may well require different settings to that required by a mouse. In the Mac environment the main setting is the double click speed. If this is set too fast it may be impossible to produce a double click. Ensure this is set to an appropriate value in the mouse settings to allow for double clicks via a stylus. This setting is found in the System Preferences dialog, under Keyboard and Mouse (10.4/5) and Mouse (10.6). The UPDD Console, Click Mode dialog, System settings will invoke this dialog as shown below: Mac OS X, 10.4 Tiger and 10.5 - Leopard
Snow Leopard
|
||||||||||||||||||||||||||||||||||||||||||||||
Touch utilities
Virtual Keyboards Mouse Cursor utilityTouch
screen interfaces do not necessarily require a desktop cursor to be used or
prefer a different cursor, such as crosshair, to the standard arrow associated
with mouse usage. Should you require a mouse cursor utility you may find the
Mighty Mouse utility of use, available at http://www.unsanity.com/products.php |
||||||||||||||||||||||||||||||||||||||||||||||
Current Limitations
UPDD
was originally developed for Windows and has since been ported to other OS.
Not all features have been ported to Linux, they include:
|
||||||||||||||||||||||||||||||||||||||||||||||
Contact
For further information or technical assistance please email the technical support team at technical@touch-base.com |
||||||||||||||||||||||||||||||||||||||||||||||